
ReportServer Scheduling
In this blog entry we would like to draw your attention to an important feature of ReportServer: Scheduling.
Scheduling in RS allows you to run reports (or scripts) automatically at a predefined time. The results can be either sent by e-mail or stored in a TeamSpace. For this purpose, we will provide a step-by-step guide to give you insight into this central functionality.
We will discuss four points:
- Scheduling a report variant to a given TeamSpace
- Conditional scheduling of reports
- Customized scheduling via “Send to”
- Scheduling of scripts
Here we go.
Scheduling a variant to a given TeamSpace
In this first example, we focus on automatically saving a variant of a dynamic list into a TeamSpace at predefined times, i.e. we schedule this variant into a given TeamSpace. Note that only variants may be scheduled, since they contain all necessary information, e.g. columns definition, parameters, etc.
You can read here for gaining some basic understanding of scheduling.

A window opens in which the required scheduling settings can be set. These are:
- Export type – Sets in which format your report should be exported. You can choose between Excel, CSV, HTML, PDF and Template.
Note: The option “Display advanced options on the following pages” should remain deactivated. We will explain this feature in more detail in further sections.
As soon as you click on “Next”, the receiver selection window appears. Here you can choose between sending the result as e-mail or storing it in a TeamSpace. As we mentioned before, in this example we choose storing it in a TeamSpace.

2. Deselect “Send via attachment”.
3. Select “Store as a file in TeamSpace?“.
4. Select a TeamSpace and a folder in which the variant should be stored.
5. In the “Name” field you can specify the name of your resulting report. You may use dynamic expressions for this purpose. These have the form ${expression}. More details here. In our example, we set the name of the report to:
My Report ${today.firstDay()} - All Planes
The expression ${today.firstDay()} sets the result string to midnight at the first day of the current month. If the report is run at the 10th of March, 2018, the result of ${today.firstDay()} would be “20180301”.
You can of course use all formulas specified in the documentation.
After you have made these settings, click on “Next”.
A window appears showing the timing settings.

| Time | Here you can set the time of the day at which the report should be executed and sent. You can set a fixed time or an interval. |
| Trigger | This setting lets you specify how often the report should be executed and sent (daily, weekly, …). |
| Duration | Here you can specify the period of execution.
You can select to execute the report forever (no end), end the execution after a fixed number of executions, or end the execution at a specific date. |
After saving the schedule, the report will be executed and sent to your TeamSpace folder at the date(s) specified. The resulting report gets the name you set in Step 5 after evaluating the expressions. For example:

You can also use boolean expressions, arithmetic operators, string functions, and object expressions in your report name. As a very simple example, we can also set “My Report ${1>2} – Last year’s payments”. The expression ${1> 2} will of course evaluate to false, so the result would be:
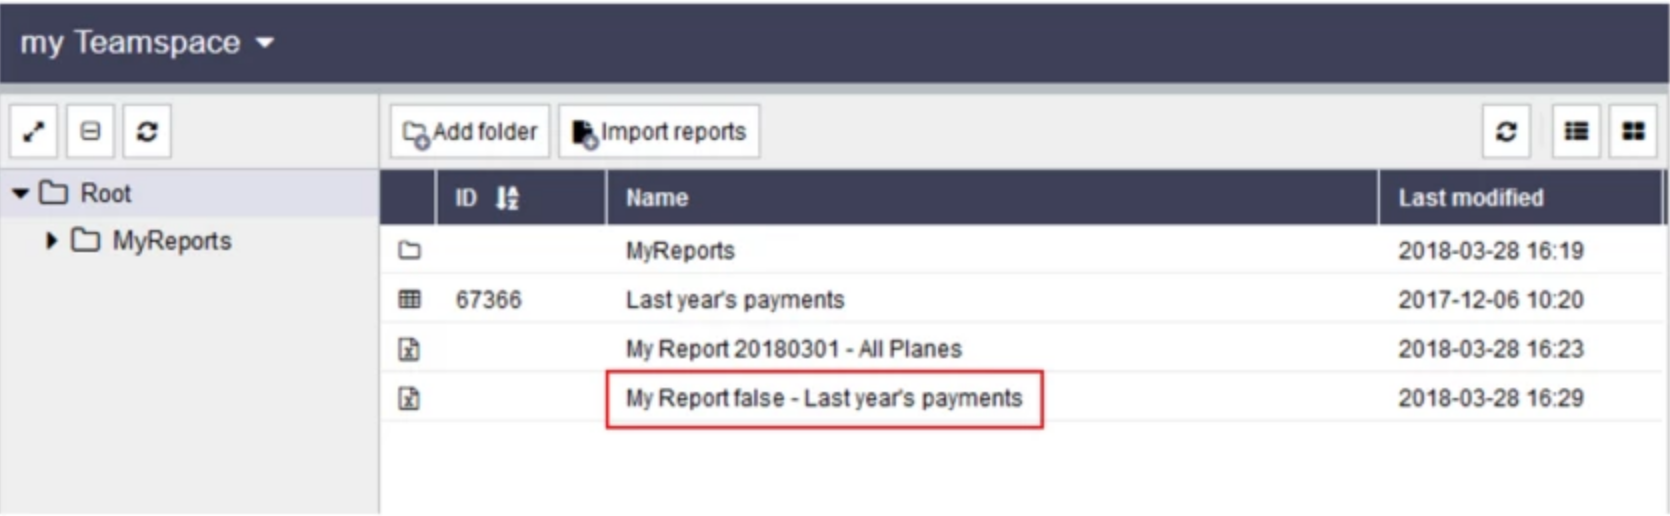
In this section, we saw an example of sending a report to a given TeamSpace. You can alternatively send the report to predefined users via E-mail if you select the corresponding checkbox in Step 1.
Conditional Scheduling
Apart from the settings we discussed in the previous section, ReportServer features conditional scheduling. This means that the variant can be set to be executed in a conditional manner, i.e. only if the given condition is met during the scheduled execution time.
Creating a condition report
First of all, a condition report must be created. The condition report is a variant of a dynamic list which we will use during conditional scheduling.
The demo data comes with the table T_AGG_PRODUCT, which contains information about products. As an example, we create a variant of the T_AGG_PRODUCT as a condition report. We select the PRO_PRODUCTNAME column and we will set the condition to be met if this column contains at least 10 entries.
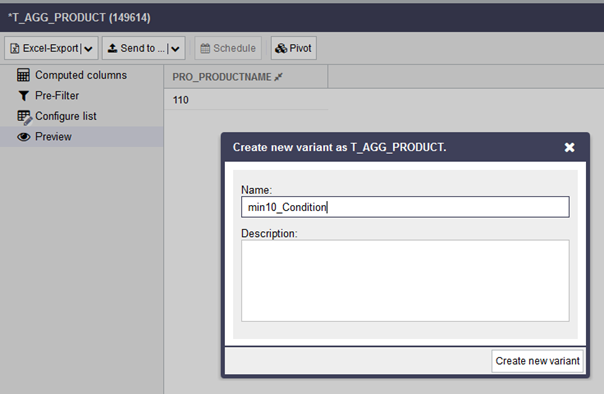
For this purpose, open the report “T_AGG_PRODUCT” (Administration -> Reports). Select the column “PRO_PRODUCTNAME” and set the aggregate function “Count” as shown in the screenshot.

You can enter an alias for your column, e.g. NUMBER_OF_PRODUCTS.
Save the report as a variant and call this “min10_Condition”.
Note that you need to ensure that your condition report only always returns a single row. In the above example, the report contains only the column PRO_PRODUCTNAME.
Creating a condition
Now that we have a condition report, it is time to create the condition.
In this example, we will create a condition that uses the condition report “min10_ Condition” we previously created.
To do this, open the terminal in RS (CTRL + ALT + T) and enter the following command:
rcondition create id:Report:152649min10_Condition myCondition"Min 10 entries of PRO_PRODUCTNAME" |
The easiest to provide the report is via id. In the example the id is 152649 so we can use the above command.
Note: The id for the report can be found in the heading line of the variant. In our example, the id of the condition report “min10_Condition” is 152649.
You can find here the syntax of the rcondition command.
ReportServer confirms the creation of the condition with a “Condition created” message.
You can check the created conditions via the “rcondition list” command, and remove conditions with “rcondition remove”.
Using the condition while scheduling
Finally, we have a condition and can now use it when scheduling. For this, when we schedule a report, make sure to check the box “advanced options” on the first page of the scheduling wizard.
We choose the dynamic list “T_AGG_PRODUCT” for scheduling and select two columns: PRO_PRODUCTNAME and Y_AVG_PRICE. Save this report as a variant under the name “Productname_avgPrice”. This is the variant we are going to schedule using the condition report “min10_Condition”.

Open the variant “Productname_avgPrice” and click on “Schedule”. Check “advanced options” and follow all steps described in Section 1 (“Scheduling a variant to a given TeamSpace”) until you reach the “Conditional Scheduling” window.
Click on “Add condition” and select the condition “min10_Condition”.
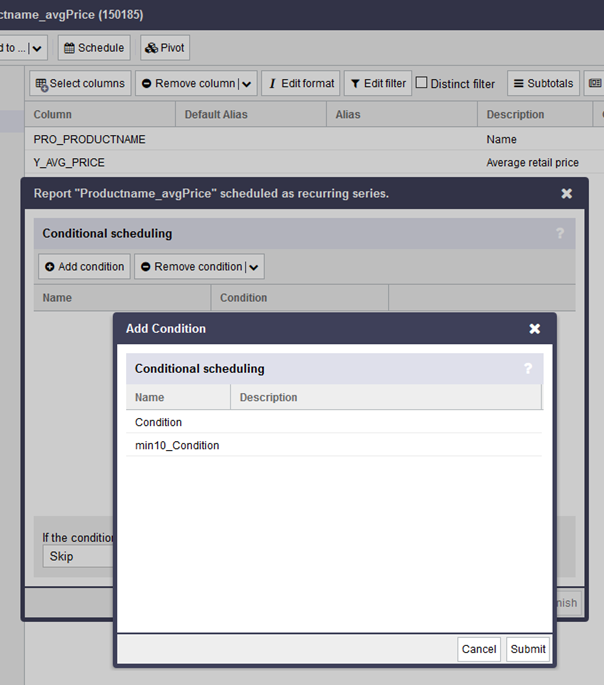
Click on the Submit button to define the condition:
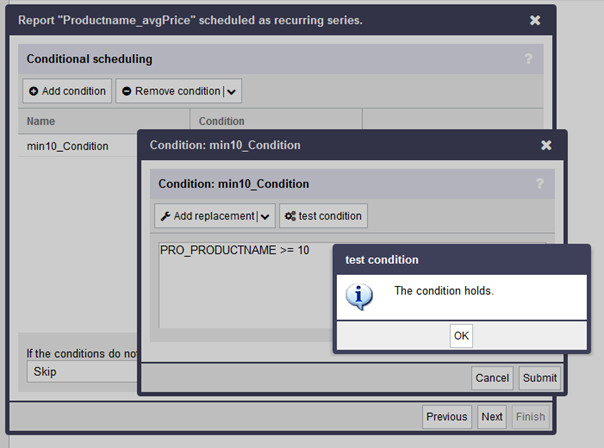
Here you can set the specific condition. In our example, we set the condition to
PRO_PRODUCTNAME> = 10
which means that the condition holds if the number of products (PRO_PRODUCTNAME) is at least 10. You can test the condition for validity with the “test condition” button.
With this, the conditional scheduling is set. Before the report is executed while scheduling, the condition is checked for validity. If the condition is true, the report is executed and sent.
Note: Setting the option “If the conditions do not hold” you can define the behavior if the condition is not true. Either skip the execution (which is probably the usual case) or retry the execution.
Condition via Scripting
You can alternatively set the condition via a small script. The basic outline of the script is:
importnet.datenwerke.scheduler.service.scheduler.hooks.SchedulerExecutionHookimportnet.datenwerke.scheduler.service.scheduler.hooks.adapter.SchedulerExecutionHookAdapterimportnet.datenwerke.rs.scheduler.service.scheduler.jobs.report.ReportExecuteJobimportnet.datenwerke.rs.base.service.reportengines.table.entities.TableReportimportnet.datenwerke.rs.base.service.reportengines.table.output.object.CompiledTableReportimportnet.datenwerke.scheduler.service.scheduler.helper.SkipJobExecutiondef HOOK_NAME = "SkipEmptyListSchedulerHook";def callback = [ doesVetoExecution : { job, logEntry -> if(job should not be executed) returnnewSkipJobExecution("No data") } ] as SchedulerExecutionHookAdapterGLOBALS.services.callbackRegistry.attachHook(HOOK_NAME, SchedulerExecutionHook.class, callback) |
So, basically, you implement the method doesVetoExecution as part of hook SchedulerExecutionHook. One implementation, which checks whether or not the report contains any data (note that this only works with dynamic lists) would be:
importnet.datenwerke.scheduler.service.scheduler.hooks.SchedulerExecutionHookimportnet.datenwerke.scheduler.service.scheduler.hooks.adapter.SchedulerExecutionHookAdapterimportnet.datenwerke.rs.scheduler.service.scheduler.jobs.report.ReportExecuteJobimportnet.datenwerke.rs.base.service.reportengines.table.entities.TableReportimportnet.datenwerke.rs.base.service.reportengines.table.output.object.CompiledTableReportimportnet.datenwerke.scheduler.service.scheduler.helper.SkipJobExecutiondef HOOK_NAME = "SkipEmptyListSchedulerHook";def callback = [ doesVetoExecution : { job, logEntry -> if(job instanceofReportExecuteJob && job.getReport() instanceofTableReport){ job.doExecute() if(job.getExecutedReport() instanceofCompiledTableReport && !job.getExecutedReport().hasData()){ returnnewSkipJobExecution("No data") } } } ] as SchedulerExecutionHookAdapterGLOBALS.services.callbackRegistry.attachHook(HOOK_NAME, SchedulerExecutionHook.class, callback) |
For a general introduction to scripting, have a look here.
Customized Scheduling via “Send to”
As we noted in Section 1, you can send reports via scheduling only to ReportServer users via e-Mail. If you want to send the reports to arbitrary e-Mail addresses, you have to implement the “Send to” functionality. More information on this can be found here. Using this functionality, you can further send your reports to whatever recipient to need, e.g.: external e-mail address(es), include another (extra) report, send the report to an external file system, ftp, etc.
In this example, we will send a report as PDF to an external e-Mail address and we will include an “extra” report as Excel file. This extra report is identified via its id: 5220 in our case.
Here is the complete script:
importjava.util.HashMap;importnet.datenwerke.rs.core.service.sendto.hooks.SendToTargetProviderHookimportnet.datenwerke.rs.core.service.sendto.hooks.adapter.SendToTargetProviderHookAdapterimportnet.datenwerke.rs.core.client.sendto.SendToClientConfigimportnet.datenwerke.rs.core.service.mail.MailService;importnet.datenwerke.rs.core.service.mail.SimpleAttachement;importnet.datenwerke.rs.core.service.mail.SimpleMail;importnet.datenwerke.rs.core.service.reportmanager.ReportExecutorService;importnet.datenwerke.rs.core.service.reportmanager.ReportService;importnet.datenwerke.rs.core.service.reportmanager.engine.CompiledReport;importnet.datenwerke.rs.core.service.reportmanager.engine.config.ReportExecutionConfig;importnet.datenwerke.rs.core.service.reportmanager.entities.reports.Report;importnet.datenwerke.rs.core.service.reportmanager.exceptions.ReportExecutorException;importnet.datenwerke.rs.core.service.sendto.hooks.SendToTargetProviderHook;importnet.datenwerke.rs.scripting.service.scripting.scriptservices.CallbackRegistry;importnet.datenwerke.scheduler.service.scheduler.entities.AbstractJob;importjava.util.HashMapdef HOOK_NAME = "Send via custom e-mail"reportService = GLOBALS.getInstance(ReportService.class)reportExec = GLOBALS.getInstance(ReportExecutorService.class)mailService = GLOBALS.getInstance(MailService.class)String doSendMail(report, values, execConfig) { try{ CompiledReport mainReportCompiled = null; if(execConfig != null) { mainReportCompiled = reportExec.execute(report, "PDF", execConfig); } else{ mainReportCompiled = reportExec.execute(report, "EXCEL", ReportExecutionConfig.EMPTY_CONFIG); } Report extraReport = reportService.getReportById(5220); CompiledReport extraReportCompiled = extraReportCompiled = reportExec.execute(extraReport, "PDF", ReportExecutionConfig.EMPTY_CONFIG); SimpleMail mail = mailService.newSimpleMail(); mail.setSubject("Testreport"); mail.setToRecipients("email@email.com"); mail.setFrom("from@email.com"); SimpleAttachement mainReportAttachement = newSimpleAttachement(mainReportCompiled.getReport(), mainReportCompiled.getMimeType(), "main.pdf"); SimpleAttachement extraReportAttachement = newSimpleAttachement(extraReportCompiled.getReport(), extraReportCompiled.getMimeType(), "extra.xlsx"); mail.setContent("Email body", mainReportAttachement, extraReportAttachement); // send mail mailService.sendMail(mail); return"Send the report via mail. Config "+ values; } catch(ReportExecutorException e) { e.printStackTrace(); }}def callback = [ consumes : { report -> def config = newSendToClientConfig(); config.setTitle("Send via custom e-mail"); returnconfig; }, getId : { -> return"someUniqueIdA" }, sendTo : { report, values, execConfig -> returnthis.doSendMail(report, values, execConfig); }, scheduledSendTo: { compiledReport, report, format, values, execConfig -> returnthis.doSendMail(report, values, execConfig); }] as SendToTargetProviderHookAdapterGLOBALS.services.callbackRegistry.attachHook(HOOK_NAME, SendToTargetProviderHook.class, callback) |
You can install the script with “exec -g yourscript.groovy”. After installing the script, you will see a new menu entry “Send via custom e-mail” in the “Send to” menu:
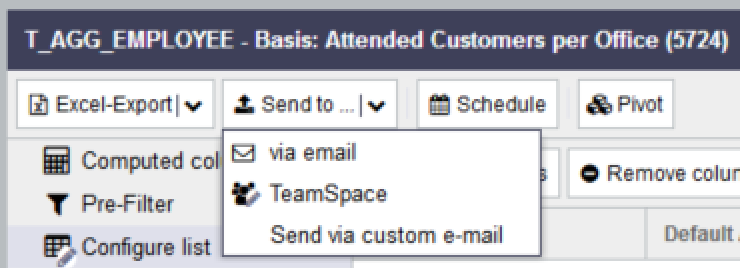
This script can also be used via scheduling. A new item “Send via custom e-mail” appears in your scheduling settings window.
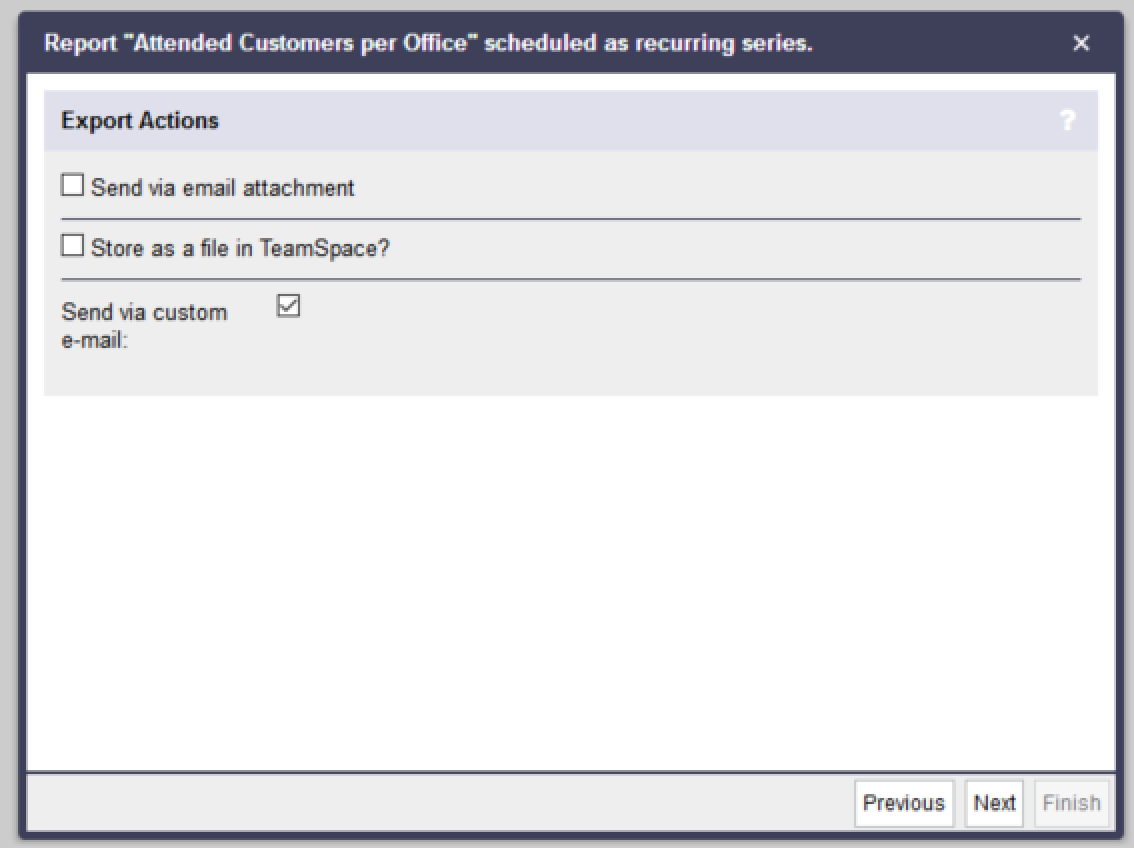
Note: The original “send via email attachment” and the new “Send via custom e-mail” entries are completely independent of each other. You can use one or both independently.
Script Scheduling
In ReportServer, not only reports can be scheduled, but also scripts. In such way, you can set a script to be executed once in the future, or periodically.
E.g., you can schedule the script “myScript.groovy” to be executed every day at 12:00 with this command:
scheduleScript execute myScript.groovy " "every day at 12:00 |
Refer to the documentation for more examples.
Here, we will create a script that sends an e-mail to a given address and schedule it every hour at 23:00 for 10 times. We will call it “heartbeat.groovy” and it will inform us if ReportServer is actually running.
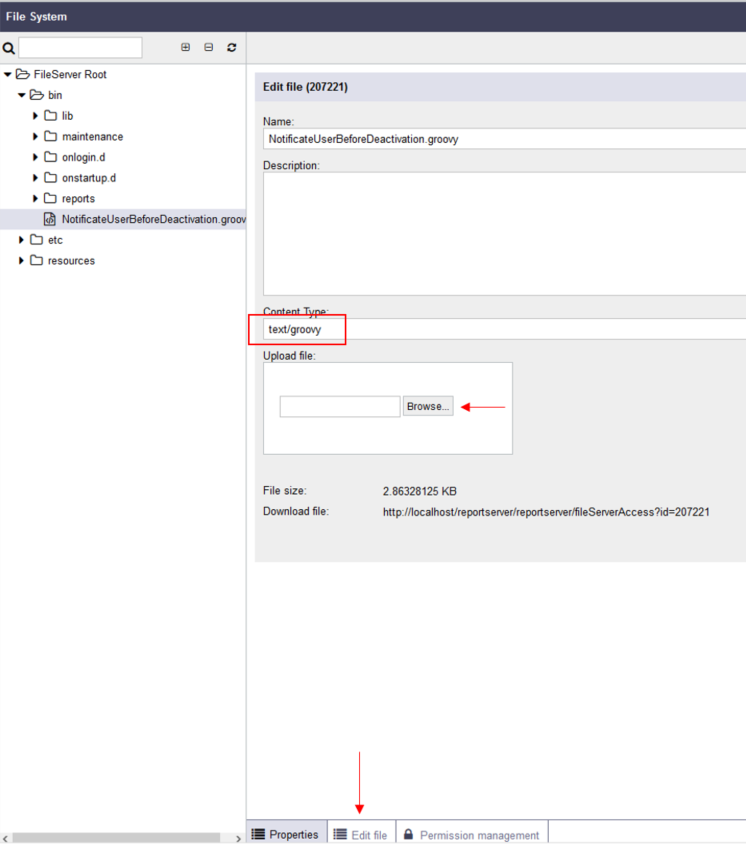
Create a script object (Administrator -> File System -> bin). Scripts are located in the bin folder or one of its subfolders.

1. Create a new file.
2. In our example we call our script “heartbeat.groovy”.
3. Enter “text/groovy” as the content type.
4. Enter the file contents. There are two ways to do this:
i) You can upload the content.
ii) You can edit the content directly in the tab “Edit File”.
Enter the following script:
importnet.datenwerke.rs.core.service.mail.MailService;importnet.datenwerke.rs.core.service.mail.MailTemplate;importnet.datenwerke.rs.core.service.mail.SimpleMail;importnet.datenwerke.security.service.usermanager.UserManagerService;importnet.datenwerke.security.service.usermanager.entities.User; userManagerService = GLOBALS.getInstance(UserManagerService.class);mailService = GLOBALS.getInstance(MailService.class) user = userManagerService.getNodeById(22L); // enter some User-IDsubject = "ReportServer heartbeat";message = "ReportServer is running."; sendMail(user, subject, message); voidsendMail(User u, String subject, String message) { SimpleMail mail = mailService.newSimpleMail(); mail.setSubject(subject); mail.setToRecipients(u.getEmail()); mail.setContent(message); mailService.sendMail(mail);} |
Enter your User-ID and save your script. open the terminal in RS (CTRL + ALT + T), navigate to the folder in which the script is located (e.g. cd fileserver/bin/) and execute the following command for scheduling the script:
scheduleScript execute heartbeat.groovy" "every hour at 23for10times |
You get a confirmation, e.g.:
Script heartbeat.groovy scheduled. First execution: 31.03.2018 18:23:00
In this article, we discussed the different ReportServer scheduling options and possibilities. We first discussed general scheduling using an example of scheduling to a TeamSpace folder. Then, we explained conditional scheduling and how can it be used to further control report execution based on condition reports. We briefly discussed an alternative conditional scheduling scheme via scripting. Afterwards, we described how scheduling can be further customized using the “Send to” scripting theme. Finally, we showed how to schedule script execution.
If you have any question, don’t hesitate to contact us in our forums.
Happy reporting!
Your ReportServer Team